Your chimney rises through your roof like a bridge between two worlds. Water tries to cross that bridge constantly. It pounds down during storms. It seeps during misty autumn mornings. It freezes and expands in winter. Most of it runs harmlessly away, but some doesn’t. That’s where flashing comes in.
Flashing is the thin metal barrier that sits between your chimney and roof. It’s the unsung hero that prevents water infiltrating your home. Yet it’s also one of the most neglected and misunderstood aspects of roof maintenance. Homeowners rarely think about it until water starts appearing on their bedroom ceiling.
The problem is this: flashing fails silently. You won’t notice until damage is already spreading through your timbers and insulation. By then, repair costs have multiplied. A £150 flashing fix could have prevented a £3,000 interior renovation.
How Water Gets Past Your Chimney
Adam from Point Roofing explains what happens when flashing fails. Rain hits your roof. Water doesn’t stop at the chimney, it wants to continue downward. Without proper flashing, it flows directly into the gap between the chimney and the roof opening. From there, it seeps behind your plasterboard. It soaks into timber joists. It pools in your loft space. Weeks later, you notice damp patches. Months later, you’re dealing with structural damage.
The path is disturbingly straightforward:
- Water finds a gap in faulty flashing
- It flows under the roof covering
- It travels along timber rafters
- It emerges inside your home, often far from the original leak
- Mould and rot develop in hidden spaces
- Damage compounds before you even realise it’s happening
Consider this: a single hairline crack in flashing can allow 5 litres of water into your home during a moderate storm. That’s enough to soak through insulation, dampen timber, and create ideal conditions for mould growth.
Why Flashing Fails (And It Will Fail)
Flashing doesn’t last forever. It’s made of metal—usually lead, aluminium, or zinc. Metal corrodes. Metal moves. Metal ages.
Corrosion happens gradually. If your flashing is over 20 years old, it’s already showing its age. Lead can last 50+ years, but aluminium typically fails around 20-30 years. Zinc falls somewhere in between. The coastal salt air of Norfolk accelerates this process dramatically. Homes near the sea can see flashing fail 10-15 years earlier than inland properties.
Temperature changes stress the metal. Your roof experiences enormous temperature swings. On a winter morning, it might be -5°C. By afternoon, it could be 5°C. In summer, it easily reaches 50°C or higher. Metal expands and contracts with each cycle. The sealant that holds flashing in place can’t keep up. Tiny gaps appear. Water finds them.
Roof settling creates movement. Your home isn’t perfectly still. Timber shifts as it dries and absorbs moisture with the seasons. Rafters move slightly. This movement stresses the joints where flashing meets your roof. The sealant cracks. Nails work loose. Gaps appear.
Installation quality determines everything. Here’s an uncomfortable truth: not all roofers install flashing properly. Some take shortcuts. They use insufficient sealant. They rely on single-layer flashing instead of proper layering. They don’t ensure adequate overlap. A chimney installed or re-flashed by an unqualified tradesperson can fail within 5 years. A professionally installed flashing can last decades.
What Does Proper Flashing Actually Look Like?
Understanding proper flashing helps you spot problems before they become expensive.
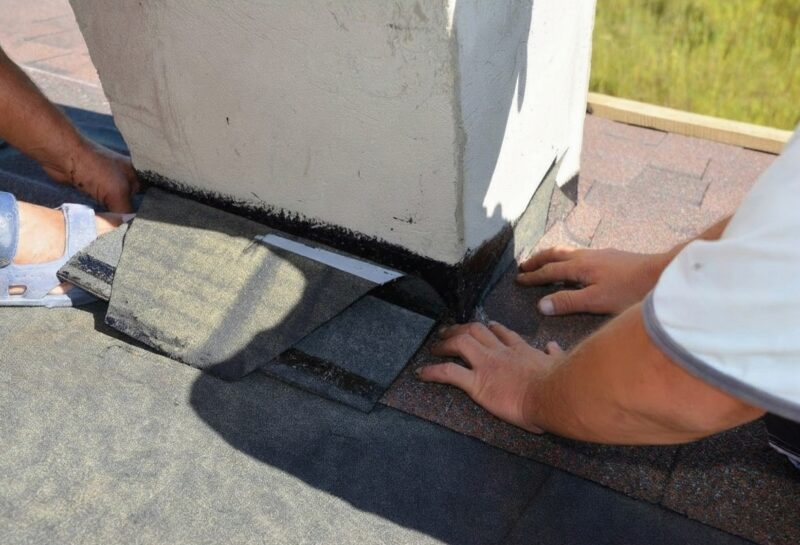
Correct flashing consists of several components working together:
- Base flashing: Sits under the roof covering, creating the first water barrier
- Counterflashing: Sits above the base flashing, overlapping it to create a water-shedding pattern
- Back pan: Sits behind the chimney, directing water away from the wall
- Cricket or saddle: Sits on the uphill side of the chimney, splitting water flow to both sides
Each piece overlaps the next. Water always flows over the layer below it, never under it. The overlap creates a cascading effect—water simply runs down and off.
This layering is crucial. Have you ever looked closely at proper roof tiling? Notice how each tile overlaps the one below? Flashing works the same way. When this principle is violated—when pieces are installed with gaps or reverse overlaps, water finds its way through.
Professional installation also requires:
- Proper sealing with high-quality sealant designed for metal and masonry
- Adequate fastening using stainless steel fixings
- Slope toward the roof edge (never flat or sloped backward)
- Clearance from nearby roof features like vents or satellites
A dodgy installation might use silicone sealant that fails after three years. It might have only one layer of flashing. It might have fasteners that rust. These shortcuts save money today and create disaster tomorrow.
The Hidden Costs of Flashing Neglect
Water damage spreads far beyond the immediate leak point. Think about your roof structure for a moment. Timber rafters support everything. Insulation keeps your home warm. Interior plasterboard provides the finished surface you see. They’re all interconnected.
When water penetrates flashing, it doesn’t stop at the rafter. It soaks into insulation, reducing its effectiveness by up to 80%. A home with wet insulation feels cold and damp regardless of heating. Your energy bills climb. Your comfort plummets.
The timber damage is worse. Wood rots when constantly damp. Dry rot can spread across timber up to 1 metre per year. It weakens structural integrity. In severe cases, it makes timber completely unsuitable for bearing loads. Replacing rafter sections costs £800-£2,000 per rafter. A roof might have 20+ rafters.
Mould follows moisture. It flourishes in lofts where ventilation is poor and moisture persists. Mould spores become airborne. They drift down through cracks into living spaces. For families with respiratory sensitivities, asthma, or allergies, this creates genuine health risks.
The domino effect explains why early intervention matters so much. Catch flashing problems at 5 years—when sealant is failing but damage is minimal—and you spend £500 on re-sealing or £1,500 on replacement. Wait until year 10, and you’re dealing with interior damage that costs £5,000+.
Spotting Warning Signs Before Disaster Strikes
The problem is knowing when to act. Flashing doesn’t announce its failure with a dramatic bang. It fails gradually. Here’s what to watch for:
Look for exterior signs first:
- Deteriorated sealant around the chimney (grey, cracked, or peeling)
- Visible gaps between flashing and chimney
- Rust stains running down the roof
- Flashing that’s visibly bent or separated from the roof
- Mortar damage on the chimney itself
Interior warning signs are more serious:
- Damp patches on the ceiling near where the chimney passes through
- Water stains that appear during or shortly after heavy rain
- Musty smells in your loft space
- Visible mould growth around the chimney
- Soft or spongy plasterboard near the chimney
The critical question is this: when was your roof last inspected by a qualified surveyor? Most homeowners couldn’t answer that question. Yet roof condition directly impacts everything from resale value to insurance coverage. A professional survey costs £300-£500 and takes two hours. It can identify problems while they’re still manageable.
Fixing Flashing Before It Fixes You
If you’ve spotted problems, you have options depending on severity.
Minor sealant failure (no water damage yet) can be addressed by re-sealing. A roofer clears old sealant, cleans the joint thoroughly, and applies new high-quality sealant. Cost: £200-£400. Time frame: one day. This buys you another 5-10 years.
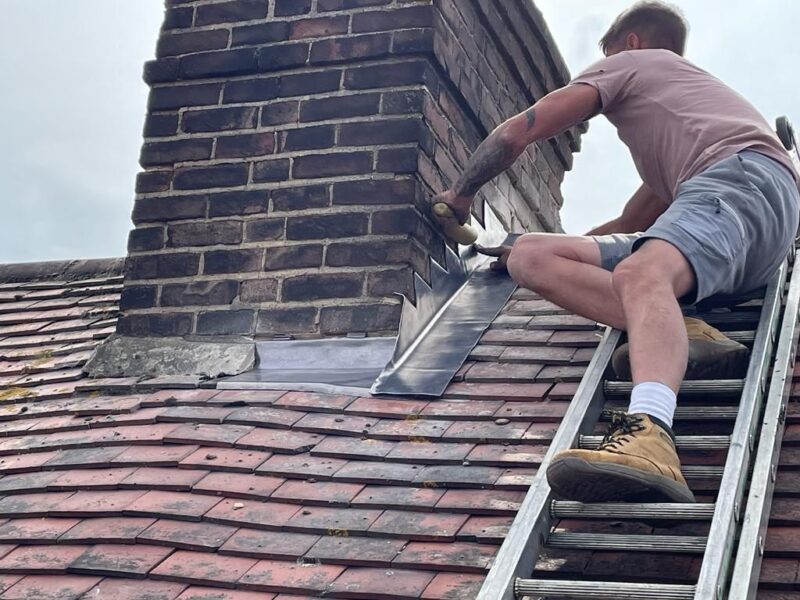
More significant deterioration (visible corrosion, gaps, minor water marks) requires flashing replacement. This means carefully removing the old flashing, inspecting the underlying timber for damage, and installing new flashing using proper techniques. Cost: £600-£1,500 depending on chimney size and accessibility. Time frame: 1-2 days.
Structural damage (wet timber, active mould, water pooling in the loft) requires comprehensive work. Damaged timber must be replaced. Insulation needs replacing. The loft requires drying out and ventilation improvement. This can easily exceed £3,000-£5,000.
Prevention is dramatically more cost-effective than cure. A homeowner who re-seals flashing at year 7 and replaces it at year 20 spends perhaps £1,500 total across 20 years. A homeowner who ignores it until water damage appears might spend £8,000 addressing secondary damage they never anticipated.
Taking Action Today
Your chimney flashing is working right now. You can’t see it doing its job because when it works, nothing happens. Water simply flows away. That invisibility breeds complacency.
The question isn’t whether your flashing will eventually fail. It will. The question is whether you’ll address it proactively or reactively.
Schedule a loft inspection if you’ve never had one. Climb up there (safely) and look around. Is the flashing area dry and clean? Or do you see staining and deterioration? If you’re uncomfortable going up there, hire a surveyor. The cost is trivial compared to water damage repairs.
If your property is over 15 years old, get your flashing assessed by a qualified roofer. Don’t wait for visible water damage. Don’t assume “it looks fine from down here.” Flashing problems develop above your head, out of sight, until they aren’t.
For Norfolk properties especially, with our salt air, year-round moisture, and frequent rainfall—flashing maintenance should be part of your regular home upkeep. It’s not glamorous. It doesn’t add obvious value. But it protects everything beneath it.
Your chimney flashing is either protecting your home right now or slowly allowing disaster to develop. Which one will you choose to address first?