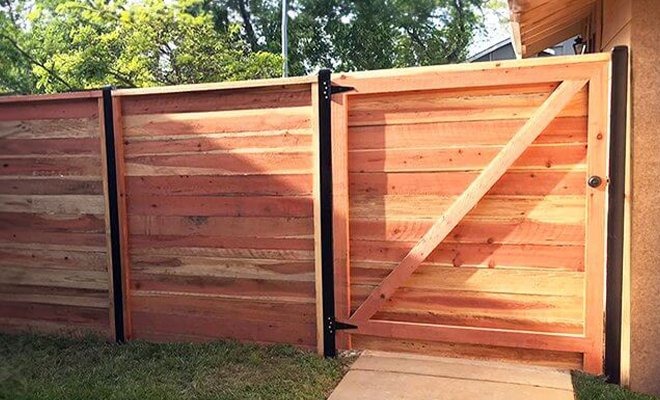
A wooden gate adds charm and privacy to any home exterior—but without the proper reinforcement, that same gate can become a constant source of frustration. One of the most common issues with timber gates is sagging or drooping over time.
What starts as a neatly leveled structure can soon become an eyesore that drags on the ground or won’t close properly.
Fortunately, preventing wooden gate droop is straightforward with the right planning and some simple hardware upgrades such as wooden gate hinges.
By investing in reliable components and paying attention to key structural details, homeowners can extend the life and appearance of their gates—without needing a complete rebuild.
Understanding Why Wooden Gates Sag
Gate droop typically occurs when one or more parts of the support system begin to fail.
This might be due to improper installation, poor-quality hardware, or natural wear and tear accelerated by weather exposure.
The weight of the timber, combined with frequent opening and closing, places a heavy load on the gate’s hinge side.
Over time, this causes it to tilt away from the post, particularly at the top corner opposite the hinges.
Common culprits include:
- Undersized or corroded hinges
- Soft or rotted gateposts
- Lack of structural bracing
- Fasteners that loosen or pull out of the wood
It’s worth noting that even well-constructed gates can develop sag if not reinforced with proper hardware. This is especially true for wider gates or those made of solid hardwoods.
Why Hinges Matter More Than Most Think
The hardware connecting the gate to its post bears the brunt of the load. If the hinges aren’t designed to support the full weight of the gate, sagging becomes inevitable.
Homeowners should consider heavy-duty options such as strap hinges, hook and band hinges, or cranked hinges, depending on their gate style and mounting needs.
Unlike basic T-hinges, these more robust alternatives offer greater strength, surface area, and long-term stability.
When selecting hinges, it’s essential to match the size and weight of the gate.
Overengineering is never a bad idea in this context—larger hinges and thicker fixings provide extra security against movement.
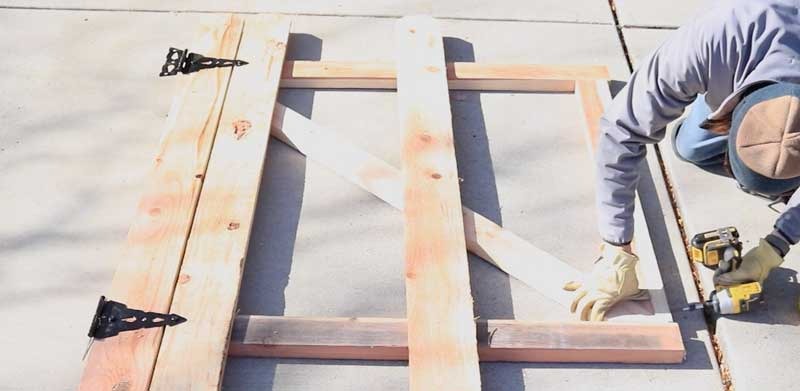
Install a Proper Diagonal Brace
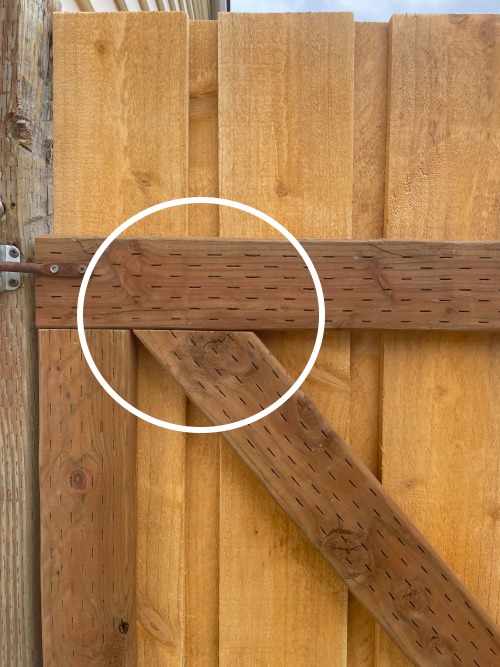
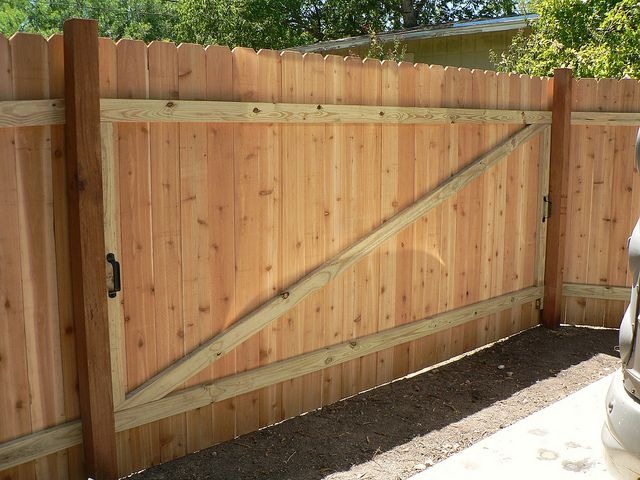
Hardware alone won’t prevent gate droop without the right bracing. A diagonal support, also called a “Z-brace,” redistributes the load away from the latch side and back toward the hinge post.
The correct orientation runs from the bottom hinge-side corner to the top corner of the latch side.
This configuration resists gravitational pull and keeps the gate square over time.
Pressure-treated timber is ideal for bracing, and it should be installed flush and tightly screwed into place. Braces that are too thin or misaligned won’t provide the necessary reinforcement.
Anchor the Gate Post Deep and Securely
Even the strongest gate hinges will fail if the post they’re attached to isn’t secure. A drooping gate often signals an issue with the post moving, especially if it was set shallowly or in soft soil.
Best practice for gateposts includes:
- Setting the post at least 600mm (2 feet) deep
- Using post mix or concrete to prevent movement
- Choosing pressure-treated timber to resist rot
- Ensuring the post is plumb before setting
If the existing post wobbles even slightly when the gate is opened or closed, it may be necessary to replace or reinforce it before addressing the gate itself.
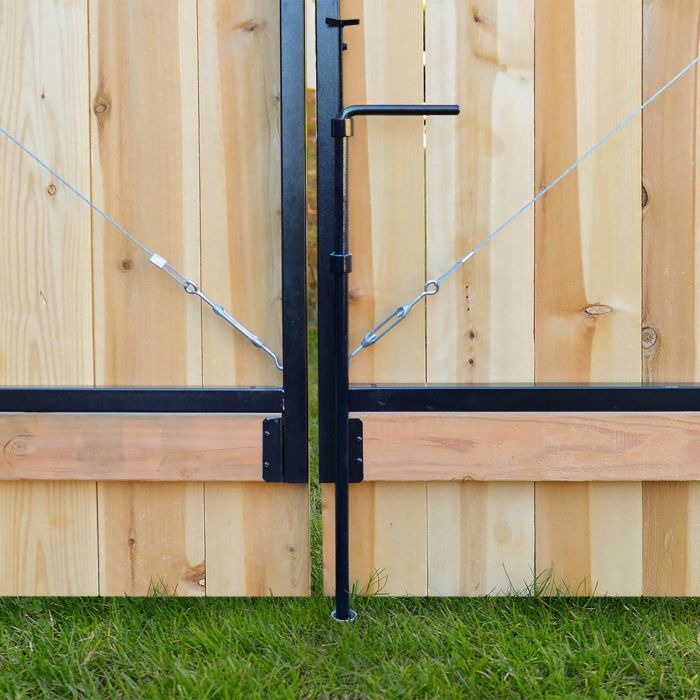
Adjustable Hinges for Long-Term Control
Some sag can develop slowly, even with solid construction. This is where adjustable gate hinges and bolts come into play. These components allow for periodic realignment without removing the gate entirely.
Hook and band hinges with threaded eyes can be adjusted using a spanner to raise or lower the gate. Over time, as timber naturally swells, shrinks, or shifts, this adjustment ability becomes invaluable.
Installing and fixing adjustable hinges from the outset may cost a little more, but it greatly simplifies future maintenance.
Key Tools and Materials for a Successful Upgrade
A well-executed gate hardware upgrade doesn’t require advanced carpentry skills—just the right tools and some preparation. Here’s what most homeowners will need:
- Drill and long wood drill bits
- Stainless or galvanized hinges
- Lag bolts or coach screws
- Pressure-treated timber for bracing
- Level, tape measure, and saw
- Concrete or post mix (if replacing or reinforcing posts)
Optional but helpful: a second person to hold the gate in position during installation. Larger gates are difficult to mount single-handedly without risking misalignment.
Mistakes to Avoid During Gate Installation
A sagging gate isn’t always the result of time—it’s often the product of small errors during installation. Avoiding these mistakes can prevent major issues later:
- Using insufficient hinges: Gates wider than 3 feet or made from solid wood require more than standard T-hinges.
- Skipping the brace: Even the best hinge hardware won’t compensate for a gate without internal structural support.
- Poor fastening: Using nails or short screws leads to eventual pull-out. Bolts or long screws with washers are essential.
- Shallow posts: Setting posts too close to the surface compromises the entire setup.
- Incorrect hinge placement: Ensure hinges are aligned correctly—cranked or offset hinges must face the right direction.
Each of these mistakes might seem minor in the moment, but combined, they create the perfect storm for gate failure.
Upgrading an Existing Gate vs. Starting Fresh
For homeowners with a gate that has already started to droop, it’s not always necessary to tear it out and start over. In many cases, replacing the hinges, adding a brace, and adjusting the alignment can restore function and aesthetics.
However, if the timber is warped or the gatepost is compromised, a full replacement may be more cost-effective long term. Evaluating the condition of all components helps determine the best path forward.
Conclusion: Build It to Last, Not Just to Look Good
Preventing wooden gate droop comes down to proper support and thoughtful hardware choices. It’s not enough for a gate to look attractive on installation day—it must function smoothly year after year, resisting the effects of weather, wear, and weight.
By upgrading a few simple elements, homeowners can enjoy a wooden gate that not only enhances curb appeal but also performs reliably for years. It’s a small investment that pays off every time the gate swings open smoothly—without dragging, leaning, or sticking.